

Lessons from learning a game engine as a cinematic artist
A few months ago, I decided to dive headfirst into Unreal Engine with zero prior experience. What started as a simple learning exercise quickly turned into a full-fledged cinematic project — complete with dusty sci-fi landscapes, hovering ships, and a handful of mistakes that taught me more than any tutorial ever could. Here’s what I learned from building my first Unreal Engine project from scratch.
What the Project Was About
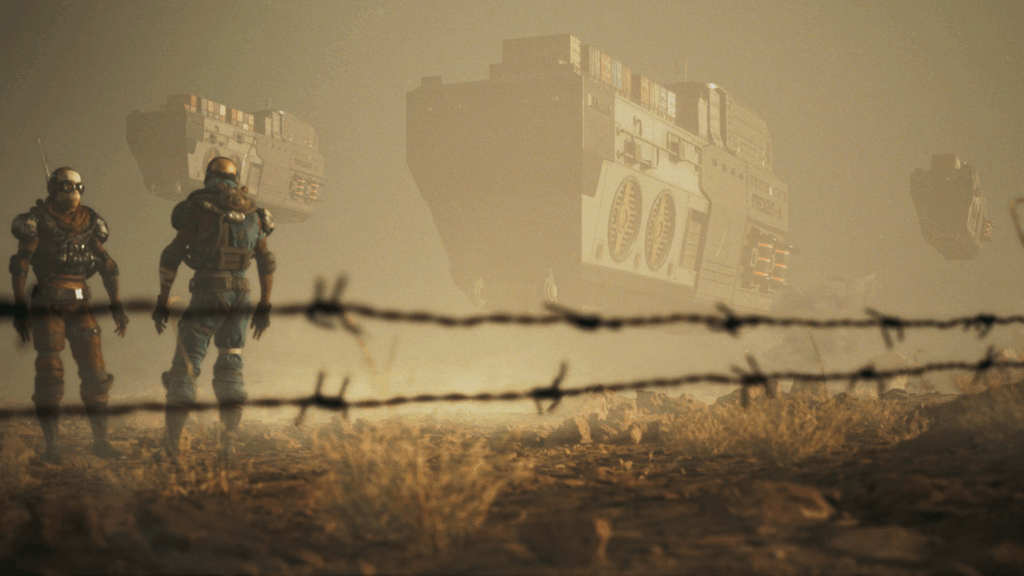
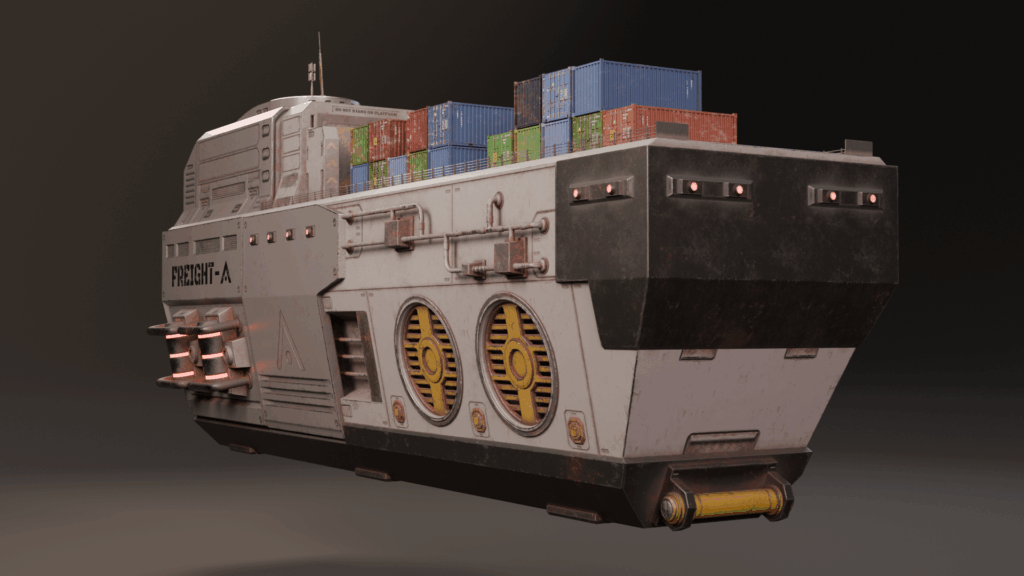
Recently, I took on a project to learn Unreal Engine from scratch. My background is primarily in Blender and post-production tools like Nuke and DaVinci Resolve, but I’d always been curious about Unreal’s real-time rendering power. To get started, I followed a course from Boundless Entertainment and decided to create a short cinematic sequence featuring a sci-fi cargo ship I had previously modeled in Blender. My vision was to build a dystopian, desert-like world—something between Dune and Star Wars—complete with haze, dust, and muted sepia tones to evoke a gritty, post-apocalyptic vibe.
Lessons Learned in Unreal Engine
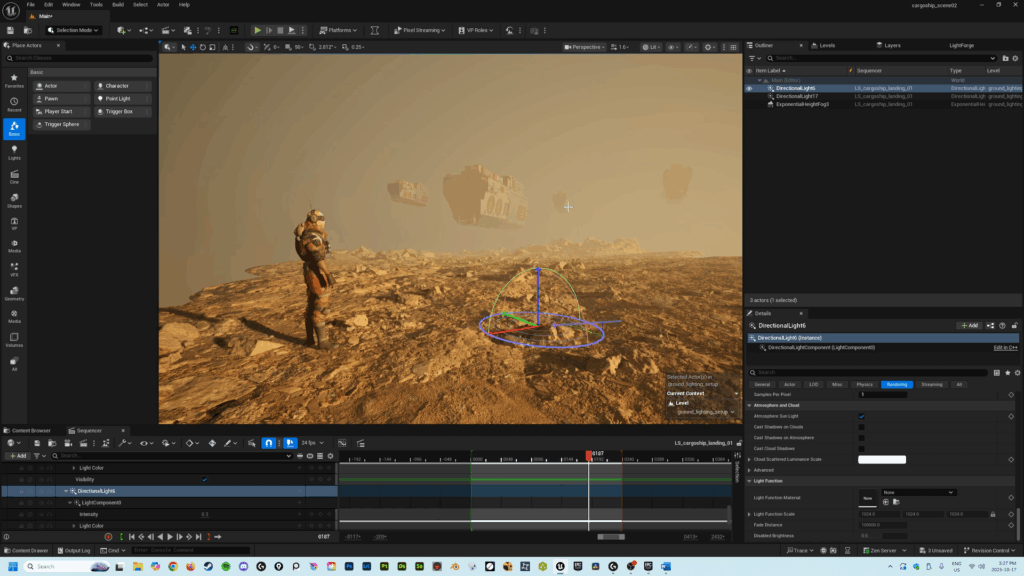
Using Unreal Engine for the first time was both intimidating and exciting. Once I got past the initial learning curve of its interface and navigation, the process began to feel almost like playing a video game—flying through 3D space, dropping in assets, and watching the world come to life in real time. I quickly appreciated how seamless the integration with Megascans and the Fab plugin was, and how easy it was to create immersive environments using Unreal’s Lumen lighting system. That said, I also learned that Unreal is a moving target—its constant updates can cause compatibility issues, as I discovered when a plugin I needed for compositing stopped working after upgrading to a new engine version. Lesson learned: always duplicate your projects before updating.
The Technical Challenges
Another big takeaway was that Unreal is a heavy and demanding application to run. Even with a fairly capable machine (an i7 CPU and RTX 3070 GPU), the large scenes I built—with high-resolution meshes, volumetric fog, and multiple animations—pushed my system to its limits. Rendering with the path tracer took an eternity, and it made me realize how resource-intensive cinematic work in Unreal can be. Beyond performance, I also ran into some quirks and bugs that required digging through forums and YouTube tutorials. If you’re new to Unreal, you’ll quickly find that troubleshooting becomes part of the creative process.
Rethinking My Workflow
While I loved how good Unreal’s real-time renders looked straight out of the box, I also discovered that it’s not the most compositing-friendly tool. Compared to Blender or Maya, Unreal offers fewer render passes and limited flexibility once the image is baked. For this project, I managed to extract a few key passes—like depth, normals, and position—but in hindsight, I’d avoid baking in effects like motion blur, camera shake, or depth of field directly in Unreal. Those elements are better handled in post-production where they can be refined and adjusted more easily.
Where It Could Improve
Looking back at the final sequence, I’m proud of what I accomplished but also aware of where I could improve. Some of the camera shake was too aggressive, the smoke plumes didn’t blend naturally with the atmosphere, and the landscape could’ve used more storytelling elements to make it feel more immersive. I also noticed that the lighting on my ships was too muddy, and the character animations a bit awkward. Overall, for a first attempt, the project achieved what it set out to do—it taught me how to navigate Unreal, what its strengths and limitations are, and most importantly, how to approach it next time with a clearer creative strategy.
PS – Watch the full video on YouTube! – https://youtu.be/0ILmDEKXY3I
Thanks for reading (and watching)!!